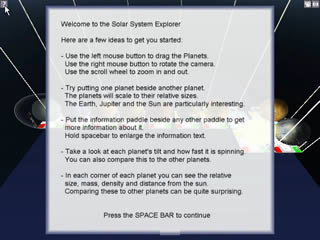
Photo Overview of Imaginality Unleashed
NOTE: There are also two video versions of this overview - a low-bandwidth version (10mb) and a high-bandwidth version (30mb). You can also go here for more details and links to other videos.
Introduction:
Imaginality Unleashed is a unique, new type of educational software developed by MindSpace Solutions. This overview starts with a demonstration of Imaginality in use, followed by a look at three of the modules we have developed, wrapping up by covering some of the details of how to get Imaginality working for you.
Demo in Use:
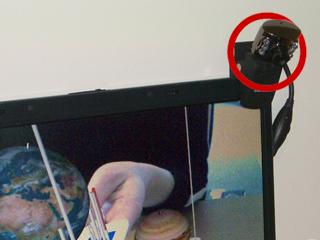
So this is the basic setup: A windows-based computer with an optional webcam.
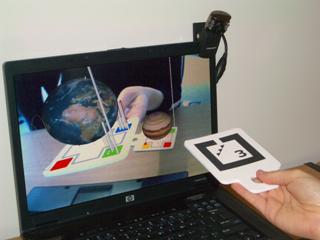 
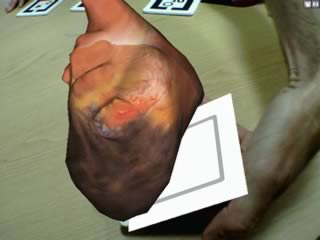
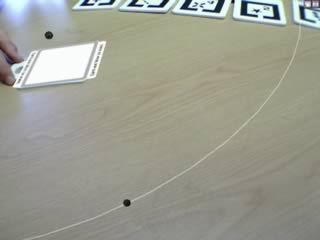
If you are using a webcam, you can also use 12 of these handheld paddles. When you hold them in front of the camera, they appear on screen with virtual objects attached to them. Notice how the virtual objects appear anchored to the paddle so you can move them around as if they were real objects.
Benefits of Virtual Objects:
This gives you the all advantages of real, physical models, combined with the advantages of virtual objects, which include:
- lower cost,
- complete safety,
- showing changes over time,
- the ability to illustrate systems that defy physics,
- and the ability to have objects interact with each other and with the user.
Imaginality Access Portal:
So lets have a closer look at Imaginality Unleashed. Everything is accessed from a single icon, which makes it easier to use.
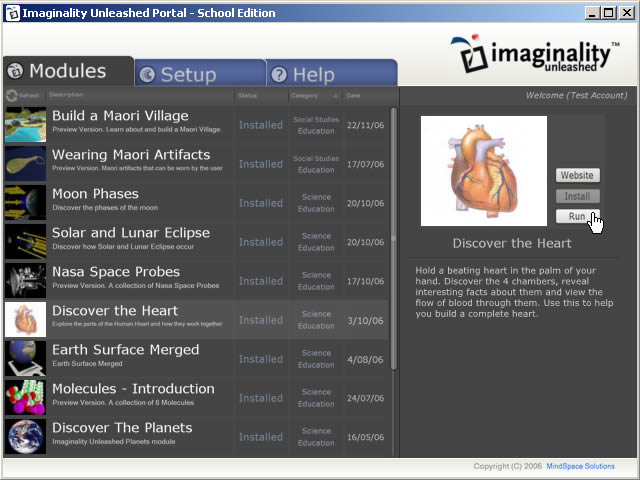
The following is the Imaginality Unleashed Access Portal. It has three main areas - Modules, Setup and Help:
- Modules shows you a list of all modules available for you to use. You can click on any module to view more information about it, or run it.
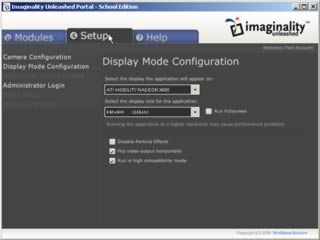
- Setup lets you change your settings globally from a central location. All modules will then use those central settings.
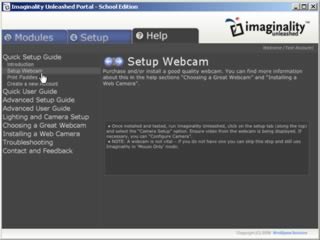
- Help is broken down into a series of topics and sub topics so you can find what you need fast.
Using Imaginality in Camera Mode or Mouse Mode:
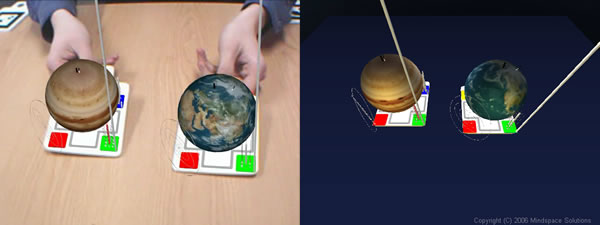
If a camera is set up, the module will load in Camera (Mixed-Reality) Mode. In this mode, simply move paddles around in front of the camera and see the results on screen. It is as if the screen is a mirror, that shows a combination of real and virtual objects.
If a camera is not present, the module will automatically run in a completely Virtual world. You will still be able to see and use all of the virtual objects in exactly the same way - the only difference is that you use your mouse. To use your mouse:
- Left-drag on any of the paddles to move the objects around the scene.
- Left-drag in the background to move the entire scene.
- Right-drag anywhere to spin the scene around.
- Use your Scroll wheel to zoom in and out of the scene.
The following image shows Camera Mode on the left and the equivalent Mouse Mode on the right.
Module Features:
Each module uses interaction that is most suited for that topic. Interaction is the same in both Camera Mode and Mouse Mode. We will now look at three modules, and their particular features.
Module Features - Planet Basics:
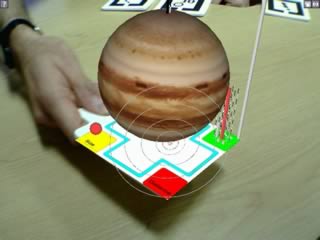 Discover the planets uses paddles 1 thru 9 for each of the planets in our solar system. Each planet is rotating at its relative speed, on the appropriate tilt off the vertical axis, which is shown. It also has extra information visualised in the four corners of the paddle: Discover the planets uses paddles 1 thru 9 for each of the planets in our solar system. Each planet is rotating at its relative speed, on the appropriate tilt off the vertical axis, which is shown. It also has extra information visualised in the four corners of the paddle:
- size,
- distance from the sun,
- mass and
- density.
In the last three corners, the data for the particlar paddle being viewed is highlighted in red.
Module Features - Planet Scaling:
When you move any two planets close together, they shrink or expand to their relative sizes and the bases of the two scaled planets turn green to indicate they are linked. This also applies to paddle 10 - the sun, which interacts in a similar way with the planets.

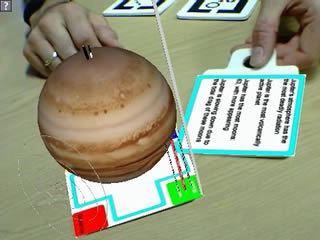
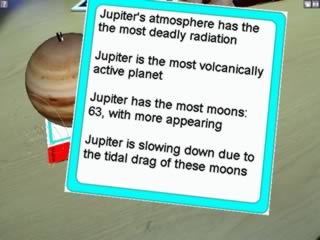
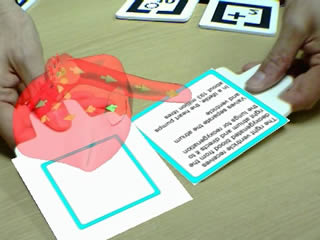
Module Features - Information Paddle:
Many of the modules also use the information paddle - the paddle with a large i on it. When it gets close to a target paddle, the border of both paddles will turn blue and the information paddle will display informative text relevant to the target paddle (left image below). You can view this text either by holding the paddle up to the camera, or by holding down spacebar or the Control key - this will zoom up the info paddle to fill the screen (shown zooming up in right image below).
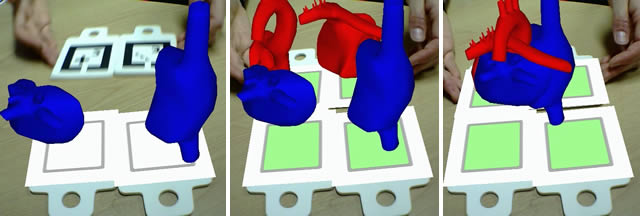
 Module Features - Heart Animation: Module Features - Heart Animation:
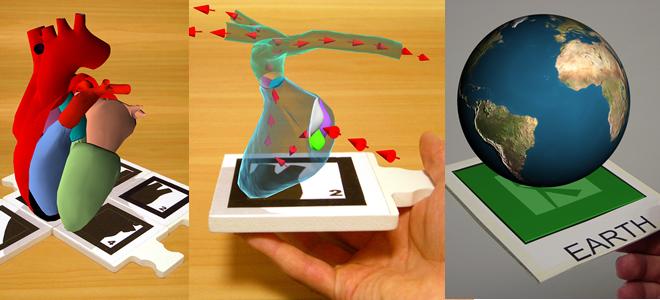
Now we will take a look at the "Building the Human Heart" Module. This starts with paddle 1 showing a beating human heart.
This is a good example of how modules can use bone or skeletal animation.
This type of animation is also used to show the flow of blood through the heart (see later) and can also be used for anything from making a volcano erupt to making a virtual character perform.
Module Features - Heart Building Activity:
The next 4 paddles each hold a chamber of the human heart. Building the Human Heart is like a 3D jigsaw puzzle - the user has to assemble the chambers correctly in order to complete the activity.
As they make progress, the bases of the paddles turn green.
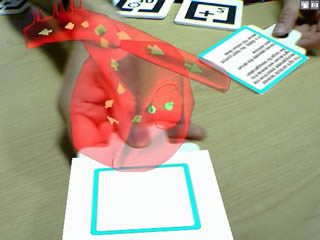
Module Features - Heart Extra Information:
Building the Human Heart also use the information paddle, but as well as showing text, the info paddle makes the heart transparent, which also reveals the flow of blood through that chamber. The information, and flow of blood, can offer clues of how to arrange the chambers correctly to complete the activity.
Module Features - Moon Phases Interaction:
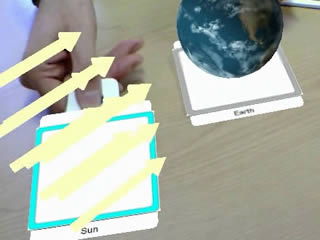
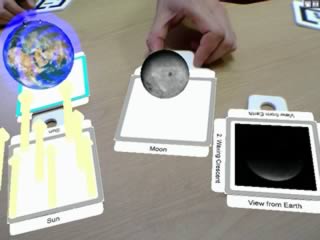
Now we will take a look at the Moon Phases Module. It starts with paddle 1 showing the Earth and Moon at their relative distance and scale. Paddles 2 and 3 show the Sun and the Earth. Due to scale, the sun is simply shown as arrows, which point towards the Earth and light it from that direction.
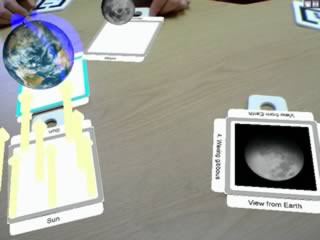
The information paddle is used as you would expect - to bring up detailed information. Paddle 5 shows what the moon looks like when viewed from the surface of the Earth. This is also visualised as a blue view cone on the Earth. Now we'll look at paddle 4 - the moon. As you move it around the Earth, the "View From Earth" paddle changes to show the appropriate phase of the moon.
Other Imaginality Features - Introduction Window:
 We will now take a quick look at a couple of other useful features. We'll do this in 'mouse-only' mode, but they work equally well when using a webcam. We will now take a quick look at a couple of other useful features. We'll do this in 'mouse-only' mode, but they work equally well when using a webcam.
Firstly, we now have an introduction window which pops up when you start a module. Simply push spacebar to dismiss it, and click on the question mark in the top left corner to bring it back up.
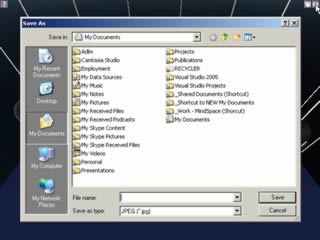
Other Imaginality Features - Capturing Images & Video:
You also have the ability to capture still images or videos of what you are doing in Imaginality. To grab a still image, click on the camera icon in the top-right hand corner. It will simply ask you where you want to save the image as a jpeg. Click once on the movie icon to start capturing a video, and click on it again to stop capturing and save it to disk. While recording, the video is being stored in RAM, so the longer you record, the more memory it takes. When you save the video, you will notice it takes a few moments to compress it into Windows media format.
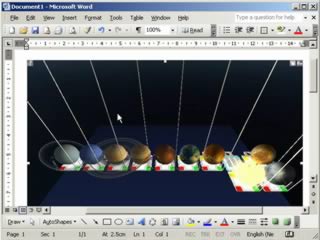
These capture tools can be useful to get students to record and document what they have been doing in Imaginality, or even for creative writing exercises. The jpegs can be easily imported into Word or Powerpoint etc, and the movies can be edited into larger projects, shared on sites like YouTube.com, or converted to other formats.
|